Makeup Tips & Tutorials

Makeup Tips & Tutorials

Top 7 Makeup Mistakes Beginners Make (and How to Avoid Them) 🙅‍♀️✨

Hey there, TrendyGlow beauties! Ever scroll through Instagram, admiring those flawless makeup looks, and then feel a pang of frustration with your own attempts? You’re not alone! 😩 Makeup is an art, and like any art, it takes practice and a little know-how to master. But don’t worry, we’ve all been there – those early days of wonky eyeliner and mismatched foundation. 🙈 The good news? Many common makeup mistakes are super easy to fix once you know what to look for! And that’s exactly what we’re diving into today! Get ready to level up your makeup game as we reveal the top 7 blunders beginners often make and, more importantly, how you can gracefully sidestep them. 😉 Ready to transform your routine from “oops” to “wow”? Let’s glow! ✨   1. The Foundation Fiasco: Wrong Shade, Wrong Application 🎨   This is perhaps the most common and noticeable mistake. A foundation that doesn’t match your skin tone or is applied incorrectly can look mask-like and accentuate imperfections rather than blurring them. 🎭 How to Avoid It: Shade Matching: Always swatch foundation on your jawline in natural light. ☀️ Let it sit for a few minutes to see how it oxidizes. The perfect shade will seamlessly disappear into your skin. Don’t test on your hand – it’s rarely the same color as your face! Application: Start with a small amount and build up coverage. Use a damp beauty sponge or a foundation brush for an even, blended finish. 🖌️ Blend, blend, blend, especially around your hairline and jawline, to avoid harsh lines. Primer Power: A good primer creates a smooth canvas, helping your foundation glide on effortlessly and last longer. 👍   2. The Unblended Blusher: Clown Cheeks Alert! 🤡   Blush is fantastic for adding a healthy flush and dimension to your face, but a heavy hand or unblended application can leave you looking like you’ve just joined the circus! 🎪 How to Avoid It: Less is More: Start with a tiny amount of product on your brush. It’s always easier to add more than to take away. Placement: Smile naturally and apply blush to the apples of your cheeks, blending upwards towards your temples. 😊 Blend It Out: Use a clean, fluffy brush to soften any harsh edges. The goal is a natural flush, not a stark stripe of color. ✨   3. The Over-Penciled Brows: Hello, Sharpie Brows! 🖊️🤨   Your eyebrows frame your face, and well-groomed brows can instantly elevate your look. However, drawing them on too darkly or too dramatically can make them look unnatural and harsh. How to Avoid It: Match Your Hair: Choose a brow product (pencil, powder, or gel) that’s one shade lighter than your natural brow hair. Feather-Light Strokes: Instead of drawing a solid line, use small, hair-like strokes to fill in sparse areas. Brush Through: Always brush through your brows with a spoolie after applying product to soften lines and blend the color evenly. 🧹   4. The Raccoon Eye Effect: Too Much, Too Dark Eyeliner/Eyeshadow 🐼👁️   While a smoky eye can be stunning, applying too much dark eyeliner or eyeshadow all around your eye, especially on the lower lash line, can make your eyes look smaller and create a “raccoon” effect. How to Avoid It: Strategic Placement: If you’re going for a defined look, consider lining only the upper lash line or extending eyeliner only halfway on the lower lash line. Soften with Shadow: If you do line your lower lash line, use a small smudge brush to soften the line with a matching eyeshadow. Less is More (Again!): When using dark eyeshadows, build up the color gradually. Blend well to avoid harsh lines.   5. Mascara Mishaps: Clumpy Lashes & Spider Legs 🕷️😩   Mascara is a magic wand for opening up your eyes, but clumpy, spidery lashes can instantly ruin an otherwise polished look. How to Avoid It: Wipe Excess: Before applying, gently wipe any excess product off the mascara wand with a tissue. टिशू Zig-Zag Motion: Wiggle the wand from the base of your lashes to the tips in a zig-zag motion to separate and coat each lash evenly. 〰️ Comb It Out: If you do get clumps, use a clean spoolie or a lash comb to brush through your lashes while they’re still wet. Fresh Mascara: Replace your mascara every 3-6 months to prevent it from drying out and becoming clumpy. 🗓️   6. The Unset Makeup: Creasing, Fading, and Sliding 🫠   Ever notice your concealer settling into fine lines or your makeup melting away by midday? Not setting your liquid and cream products is a common culprit. How to Avoid It: Setting Powder: After applying foundation and concealer, lightly dust a translucent setting powder over areas prone to creasing (under eyes) or oiliness (T-zone). 💨 Setting Spray: Finish your entire makeup look with a setting spray. This helps fuse all the layers together, makes your makeup last longer, and can give a more natural, less powdery finish. 💦   7. The Unclean Tools: Dirty Brushes, Dirty Skin 🤢 brushes   This isn’t just a makeup mistake; it’s a skincare blunder! Using dirty brushes can harbor bacteria, leading to breakouts and an uneven makeup application. 🦠 How to Avoid It: Regular Cleaning: Wash your makeup brushes at least once a week (or more frequently for foundation and concealer brushes) with a gentle brush cleaner or baby shampoo. 🧼 Air Dry: Lay them flat on a towel to air dry completely. 🌬️ Sponge Care: Clean your beauty sponges after every 1-2 uses. 🧽 There you have it, TrendyGlow gorgeous! By being mindful of these common pitfalls and implementing these simple fixes, you’ll be well on your way to achieving a flawless and natural-looking makeup application every time. Remember, practice makes perfect, so don’t be afraid to experiment and find what works best for you! 💖 What are your go-to tips for avoiding makeup blunders? Share your wisdom in the comments below! 👇 Let’s

Makeup Tips & Tutorials

How Do I Choose the Right Foundation Shade for My Skin Tone? 🤔 Your Ultimate 2025 Guide!

Hey Gorgeous! Ever stared at a wall of foundation bottles, feeling completely overwhelmed? You’re not alone! Choosing the perfect foundation shade can feel like solving a complex puzzle, but at TrendyGlow, we believe every woman deserves to find her flawless match. A foundation that’s too light or too dark can throw off your entire look, while the right shade can make your skin look radiant and seamless. ✨ No more ghostly pale or orange-tinged mishaps! We’ve created the ultimate guide to help you confidently pick your perfect foundation shade for 2025 and beyond. Get ready to unlock your most natural, glowing complexion yet!   Why the Right Foundation Shade is Your Beauty Secret Weapon 🤫   Think of foundation as the canvas for your masterpiece. If the canvas isn’t right, the whole painting won’t look its best. The correct foundation shade: Evens out your skin tone without looking mask-like. Blends seamlessly with your neck and décolletage. Provides a natural finish, enhancing your beauty, not hiding it. Boosts your confidence – because when your base is flawless, you feel unstoppable! Let’s dive into the steps that will transform your foundation shopping experience!   TrendyGlow’s Foolproof Steps to Finding Your Perfect Match:   Step 1: Understand Your Undertone – The Secret Sauce! 🎨 This is the MOST crucial step! Your skin’s undertone is the subtle hue beneath its surface. It doesn’t change with sun exposure. Cool Undertones: Your skin has pink, red, or bluish hints. You might burn easily, and veins on your wrist appear blue. Silver jewelry looks fantastic on you! Warm Undertones: Your skin has golden, yellow, or peachy hints. You tan easily, and veins on your wrist appear green. Gold jewelry complements you beautifully! Neutral Undertones: You have a mix of both cool and warm, or no obvious undertone. Your veins might appear a mix of blue and green, and both gold and silver jewelry suit you. Pro Tip: If you’re still unsure, think about how you react to the sun. If you burn easily, you likely have cool undertones. If you bronze easily, you’re probably warm. Step 2: Swatch, Swatch, Swatch! But Where? 🤔 Forget swatching on your hand – it rarely matches your face! The best places to test foundation shades are: Your Jawline: This is the ideal spot as it bridges your face and neck, ensuring a seamless blend. Your Neck/Chest: If your face is much lighter or darker than your body, test here to ensure overall harmony. Apply three to four shades that look close to your skin tone in small stripes. Let them sit for a few minutes to allow the foundation to oxidize (some foundations change color slightly once exposed to air). Step 3: The Natural Light Test ☀️ Indoor lighting (especially in stores) can be incredibly deceiving! What looks perfect under fluorescent lights might be completely wrong in broad daylight. Always step outside or stand near a window to check your swatches. The right shade will virtually disappear into your skin, blending effortlessly without leaving a harsh line. It shouldn’t look ashy, orange, or starkly different from your natural skin tone. Step 4: Consider Your Skin Type & Desired Finish ✨ While shade is key, don’t forget your skin type and what kind of finish you want! Oily Skin: Look for oil-free, matte, or semi-matte foundations. Dry Skin: Opt for hydrating, dewy, or luminous foundations. Combination Skin: A satin finish or balancing formula often works best. Desired Finish: Do you want a natural, dewy glow, or a velvety matte look? This will narrow down your options! Step 5: Don’t Be Afraid to Ask for Samples! 🛍️ Many beauty stores and counters offer samples. This is a game-changer! Take a few samples of your closest matches home and test them properly over a full day. See how they wear, how they react to your skin’s natural oils, and if they still look good in different lighting conditions. This is the ultimate test!   TrendyGlow Pro Tips for Foundation Perfection:   Your Skin Changes: Your skin tone can change slightly with seasons (tanning in summer, paler in winter). Don’t be surprised if you need a slightly different shade for different times of the year! Mix & Match: Many people own two shades and mix them to create their perfect match, especially as their skin tone fluctuates. Don’t Overdo It: Foundation is meant to even out your skin, not create a new one. Start with a small amount and build coverage where needed. Seek Expert Advice: Don’t hesitate to ask a beauty consultant at a reputable store for help. Their trained eyes can often spot your undertone and perfect match quickly.   Your Flawless Face Awaits! ✨   Finding the right foundation shade doesn’t have to be a daunting task. By understanding your undertone, swatching correctly, and testing in natural light, you’ll be well on your way to a flawless complexion that looks like your skin, only better! What’s your biggest foundation struggle? Share your tips or questions in the comments below! We love hearing from our TrendyGlow community! 👇 Discover Your Perfect Match with TrendyGlow’s Curated Foundation Collection – Shop Now!

Makeup Tips & Tutorials

What’s the Best Makeup Routine for Oily, Combination & Dry Skin? 🤔✨

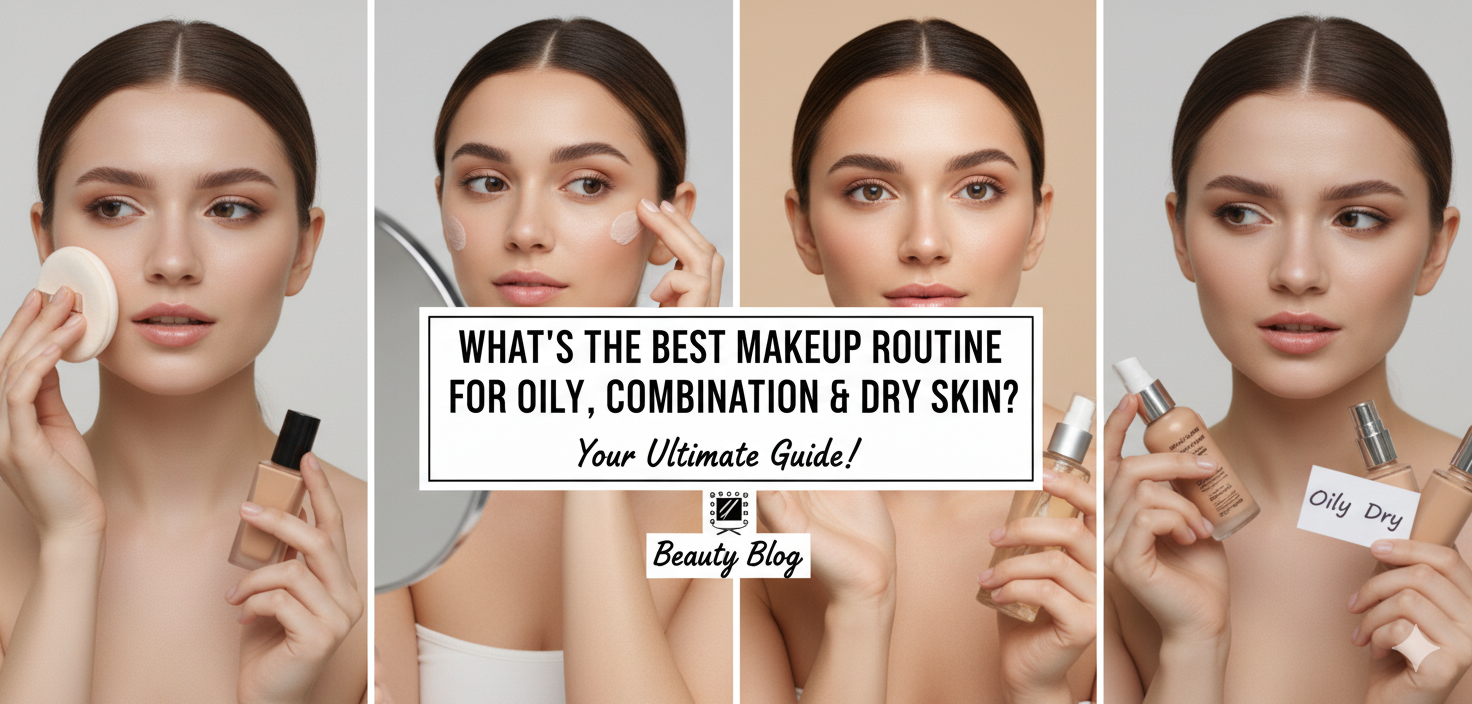
Hey there, TrendyGlow family! 👋 Ever wonder why that “holy grail” foundation your bestie raves about just doesn’t work for you? Or why your meticulously applied makeup seems to slide off by midday, while someone else’s stays flawless? The secret often lies in understanding your skin type! 💡 Just like you wouldn’t use the same shampoo for oily and dry hair, your makeup routine needs to be tailored to your skin’s unique needs. Applying the wrong products or techniques can lead to a less-than-perfect finish, breakouts, or even emphasize issues you’re trying to conceal. 😩 But don’t fret! Today, we’re breaking down the ideal makeup routines for three common skin types: oily, combination, and dry. Get ready to unlock the secrets to a radiant, long-lasting look, no matter what your skin throws at you! 🚀 Let’s dive in and get your glow on! ✨   1. Oily Skin: The Shine Control Powerhouses 💪   Oily skin types often battle with excess sebum production, leading to a shiny T-zone, enlarged pores, and makeup that tends to “melt” or crease. The goal here is shine control, longevity, and a matte (but not flat!) finish. Your Oily Skin Makeup Routine Must-Haves: Prep: Start with a lightweight, oil-free moisturizer. Follow with a mattifying primer – this is your best friend! It creates a smooth base and helps control oil throughout the day. Look for ingredients like silica or dimethicone. Foundation: Opt for oil-free, matte, or semi-matte liquid foundations, or even powder foundations. Look for terms like “long-wear,” “oil-control,” or “pore-minimizing.” Apply with a damp beauty sponge for a natural finish, blotting away any excess. Concealer: Choose a full-coverage, long-wear concealer that sets quickly to avoid creasing on oily lids or under-eye areas. Setting: This step is NON-NEGOTIABLE! Dust a generous amount of translucent setting powder over your entire face, focusing on your T-zone. Then, lock it all in with a mattifying setting spray to extend wear time and keep shine at bay. Blush/Bronzer/Highlight: Powder formulas generally work best and last longer on oily skin. Be mindful with highlighters; opt for subtle, finely milled powders rather than creamy or super shimmery formulas that might emphasize oiliness. Touch-Ups: Keep blotting papers and a compact powder handy for quick touch-ups throughout the day. Avoid: Heavy, dewy foundations and primers, excessive cream products, and skipping setting powder.   2. Combination Skin: The Balancing Act ⚖️   Combination skin is like having two skin types in one – typically an oily T-zone (forehead, nose, chin) and normal to dry cheeks. The key here is to strategically address each area without over-treating the other. It’s all about balance! ☯️ Your Combination Skin Makeup Routine Must-Haves: Prep: Use a lightweight, hydrating moisturizer all over. You might consider using two different primers: a mattifying primer on your T-zone and a hydrating or brightening primer on your drier areas (cheeks). Foundation: A satin-finish or natural-finish liquid foundation often works beautifully. You want something that offers good coverage without being overly matte or too dewy. If needed, you can lightly powder your T-zone more heavily than your cheeks. Concealer: Choose a versatile, medium-to-full coverage concealer that blends well and sets without looking cakey. Setting: Lightly dust translucent setting powder on your T-zone to control shine. On your drier areas, use a very minimal amount or skip it altogether. A hydrating setting spray can help meld everything together and add a touch of luminosity without making you oily. Blush/Bronzer/Highlight: You have the flexibility to use both cream and powder formulas! Cream blushes and highlighters can look beautiful on drier cheeks, while powders work well on the T-zone. Just remember to blend! Avoid: Extremely heavy matte foundations all over (can make cheeks feel tight) or overly dewy products all over (can increase T-zone shine).   3. Dry Skin: The Hydration Heroes 💧   Dry skin often lacks natural oils, leading to a dull appearance, flaky patches, tightness, and makeup that can look patchy, emphasize dry spots, or feel uncomfortable. The goal is hydration, luminosity, and a smooth, comfortable finish. ✨ Your Dry Skin Makeup Routine Must-Haves: Prep: This is the most crucial step! Start with a rich, hydrating moisturizer, and let it sink in. Follow with a hydrating, illuminating, or dewy primer. Look for ingredients like hyaluronic acid or glycerin. Foundation: Opt for hydrating, luminous, or dewy liquid foundations. Tinted moisturizers, BB creams, or CC creams are also great choices for a natural, glowy finish. Apply with a damp beauty sponge to press moisture into the skin. Concealer: Choose a creamy, hydrating concealer that won’t settle into fine lines or emphasize dryness. Avoid thick, matte formulas. Setting: Go easy on the powder! If you must, use a very light hand with a finely milled hydrating setting powder only where absolutely necessary (e.g., under eyes to prevent creasing). A dewy or hydrating setting spray is your best friend to melt powders into the skin and add a radiant finish. Blush/Bronzer/Highlight: Cream or liquid formulas are fantastic for dry skin! They add moisture and a beautiful, natural glow without clinging to dry patches. If using powder, ensure your skin is well-hydrated first. Avoid: Mattifying primers and foundations, heavy powdering, and any products that feel drying or tight. No matter your skin type, remembering to always prep your skin well and blend thoroughly are universal keys to success! 🔑 Experiment with these tips, listen to your skin, and you’ll discover the perfect routine that makes you feel confident and radiant. Which skin type are you, and what are your must-have products? Share your secrets with the TrendyGlow community below! 👇 We love hearing from you! 💖

Scroll to Top